
Don’t miss out on any new features
Plugin news, updates and practical Shopware tips. Once a month.
The plugin adds five tools to the Shopware CMS editor to enable the reuse of content across different experience worlds:
- Section Copy into another world of experience
- Individual block Copy into another world of experience
- Single element (slot) Copy into a compatible slot of another adventure world
- Templates - Save sections as reusable templates and insert them into other experience worlds with a click
- Copy to a linked shop (cross-shop) – Transfer sections, blocks or elements to a second Shopware shop, including automatic media synchronisation
All actions run directly in the Shopware administration. No additional configuration is necessary.
Prerequisites
- Shopware 6.6 or 6.7
- Plugin purchased in the store and activated in the administration
- After activation, reload the administration (F5) so that the new UI elements are visible
Compatibility
- Shopware 6.6 and 6.7
- Only uses standard shopware entities (
cms_page,cms_section,cms_block,cms_slot,media,media_folder) as well as separate tables for templates (biloba_cms_template) and shop links (biloba_cms_connection) - Cross-Shop-Copy communicates with the target shop exclusively via its standard admin API (integration with write permissions required)
- No third-party plug-ins required
Installation
- Purchase and download the plugin in the Shopware Store.
- In the administration under Extensions → My extensions install and activate.
- Reload administration (F5).
- Switch to the CMS view: Contents → Worlds of experience.
1 - Copy section to another world of experience
Transfer a complete section including all blocks and elements to another world of experience.
- Open the spring experience world.
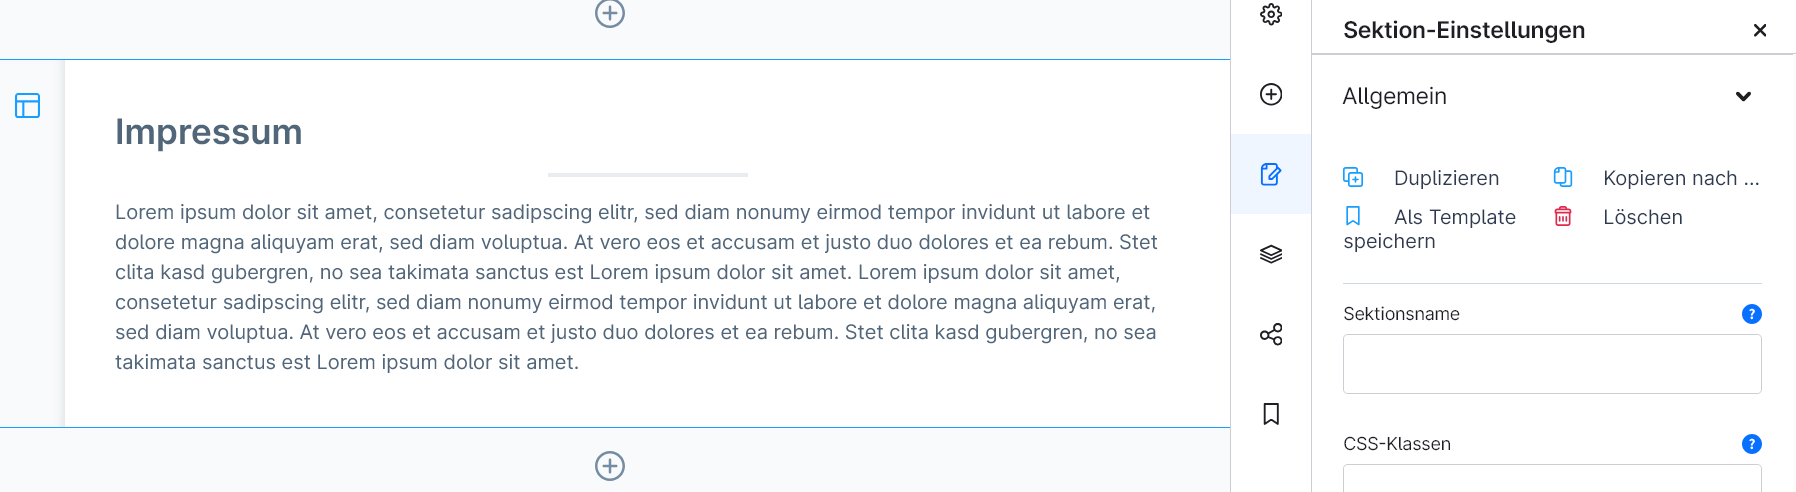
- Click on the desired section in the page preview - the section configuration panel opens in the right-hand area.
- At the top of the panel next to Duplicate to the Quickaction „Copy to ...“ click.
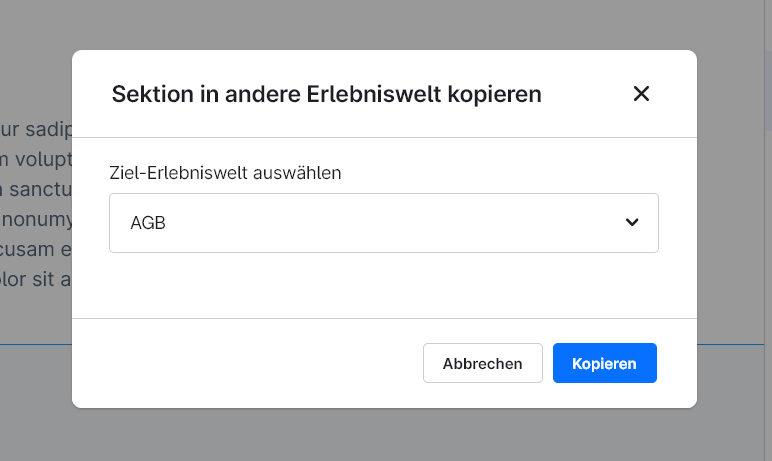
- In dialogue the Destination experience world select.
- On „Copy“ click.
The section is added at the end of the destination experience. A success message confirms the process.
Alternative via the navigator view on the right in the sidebar: three-point menu in one section → „Copy to ...“.
2 - Copy block into another world of experience
Transfer a single block including all elements in the block to another world of experience.
- Open the spring experience world.
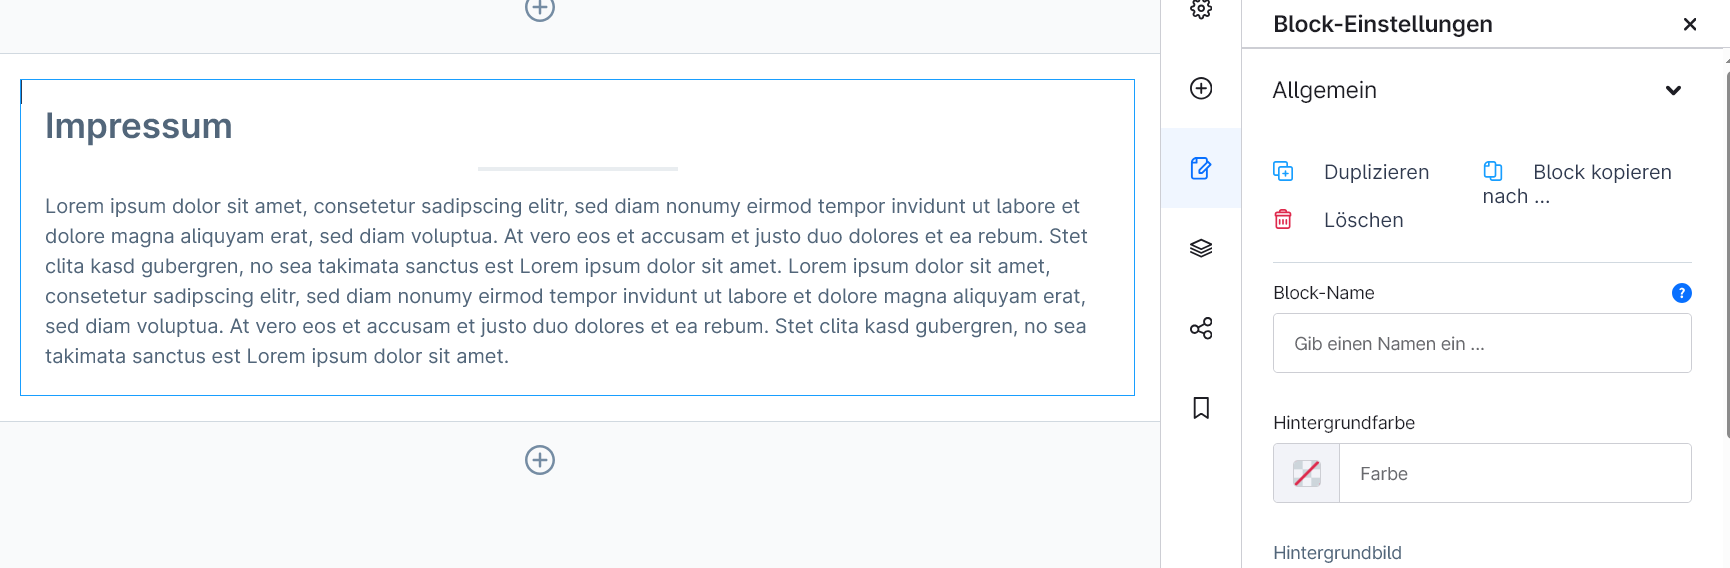
- Click on the desired block - the block configuration panel opens in the right-hand area.
- At the top of the panel, click on the quick action „Copy block to ...“ click.
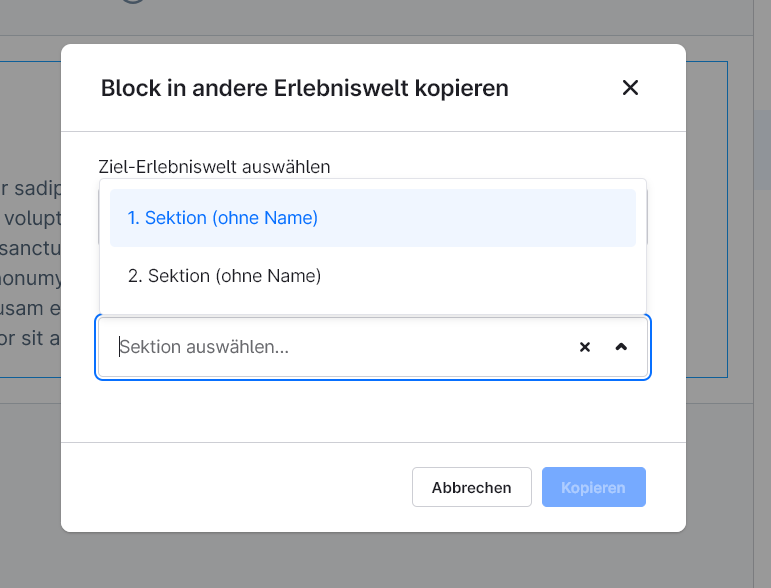
- In dialogue Destination experience world and Target section into which the block is to be inserted.
- On „Copy“ click.
The block is appended to the end of the selected section.
3 - Copy element (slot) to a compatible slot
Transfer the content of an individual element (e.g. text module, image field) to the appropriate slot of a block in another world of experience.
Copied here not the structure, but only the configuration and data of the element - the target slot remains in its position in the block. This only works between type-compatible slots (e.g. text → text, image → image).
- Open the spring experience world.
- Click on the block in which the source element is located to activate the block.
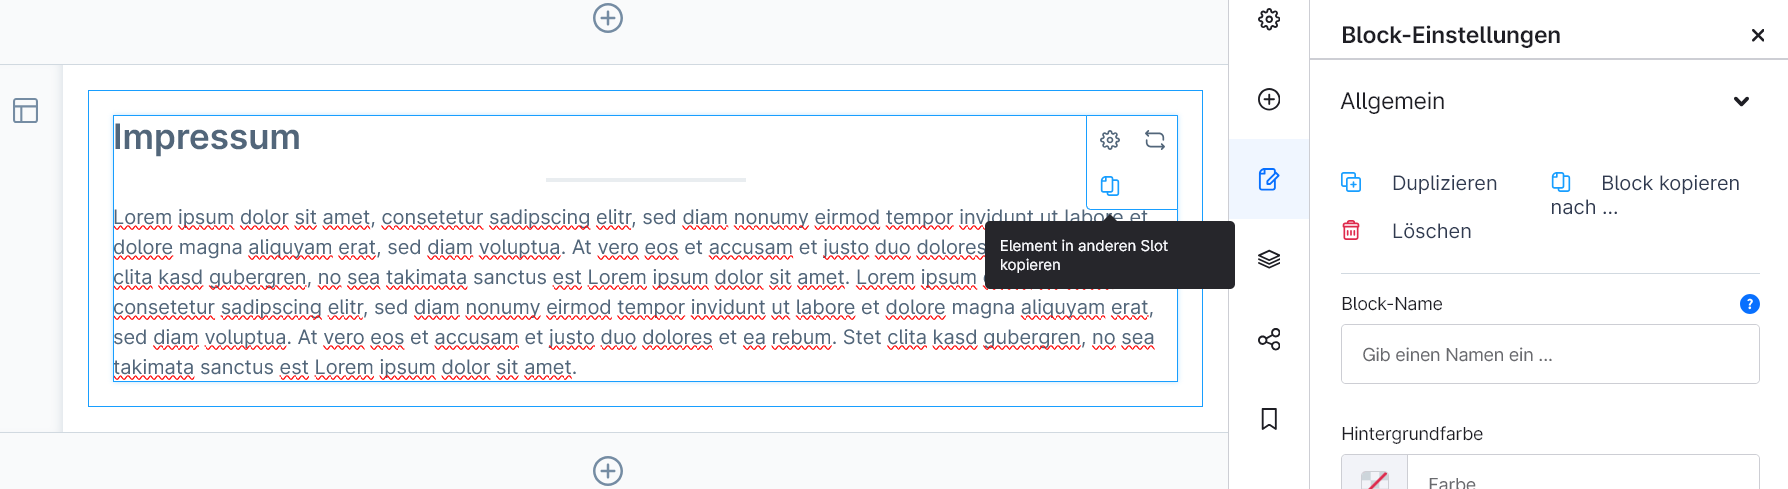
- Move the mouse over the element - an additional symbol appears at the top right of the element (Copy icon).
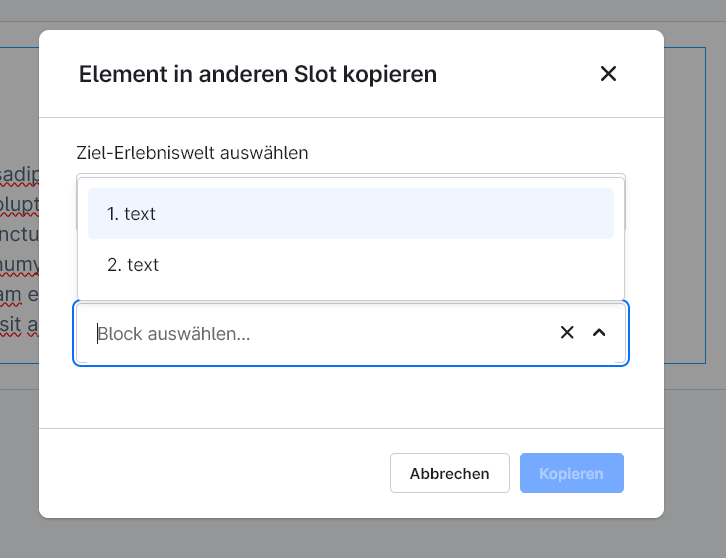
- Click on the icon - the dialogue opens.
- In dialogue Destination experience world, Target block and Target slot (only compatible slots are listed).
- On „Copy“ click.
If the selected block does not contain any type-compatible slots, the following message appears „No compatible slots found“.
4 - Templates: Save & reuse sections
Store frequently used sections as templates and insert them into any experience world with a click. Templates are managed centrally in the admin area.
Save section as template
- Open the spring experience world.
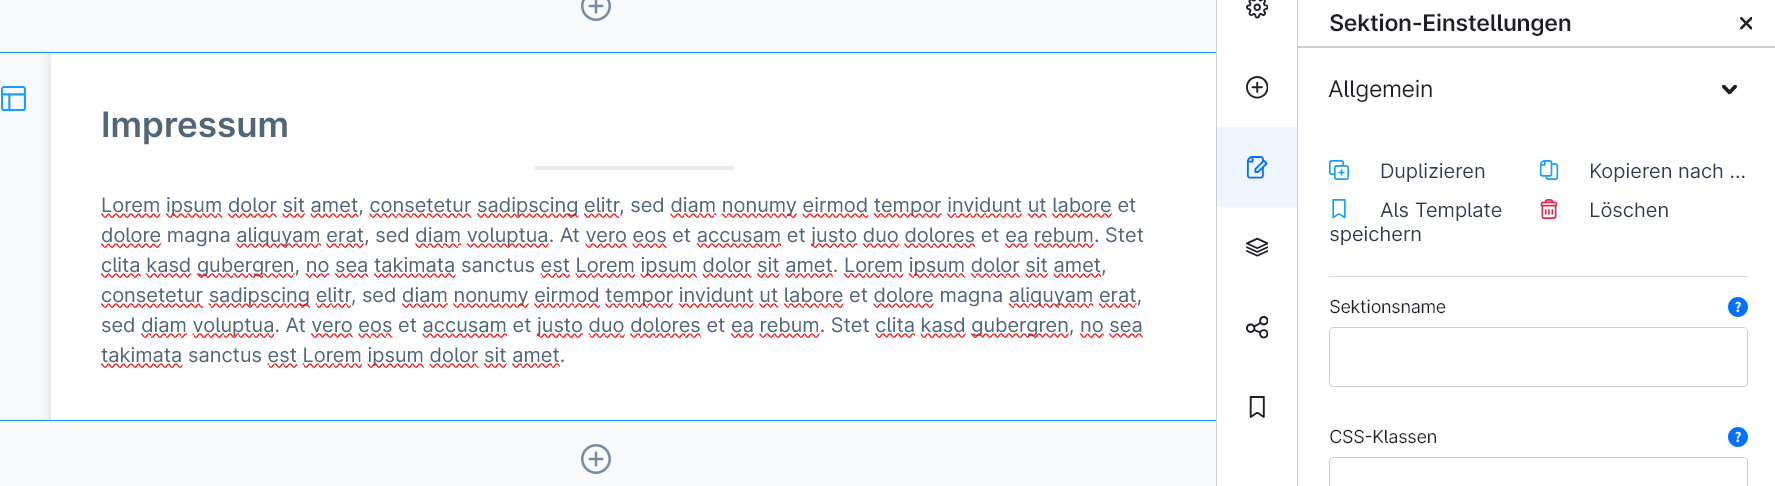
- Click on the section - the configuration panel opens on the right.
- Quickaction „Save as template“ click.
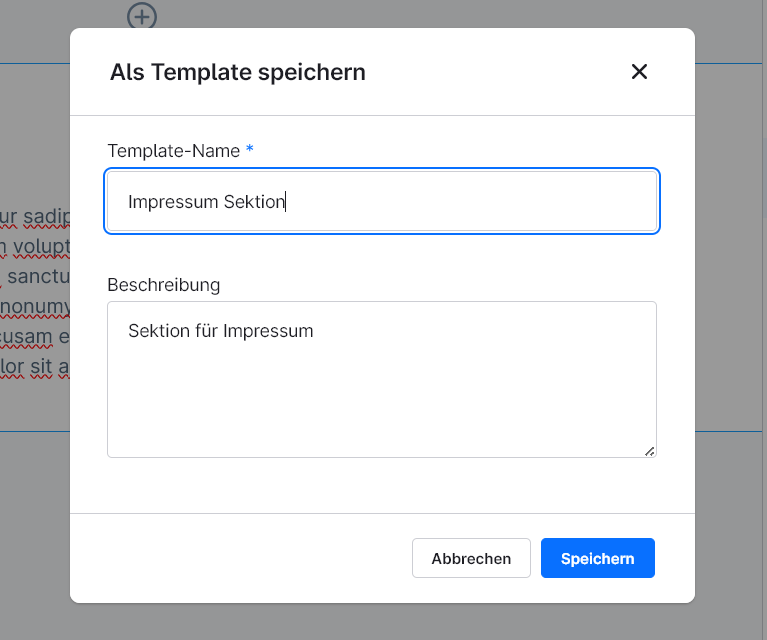
- In dialogue Template name (mandatory) and optionally a Description of the enter.
- On „Save“ click.
Alternatively via the context menu of the section in the Navigator.
Insert template into a world of experience
- Open destination experience world.
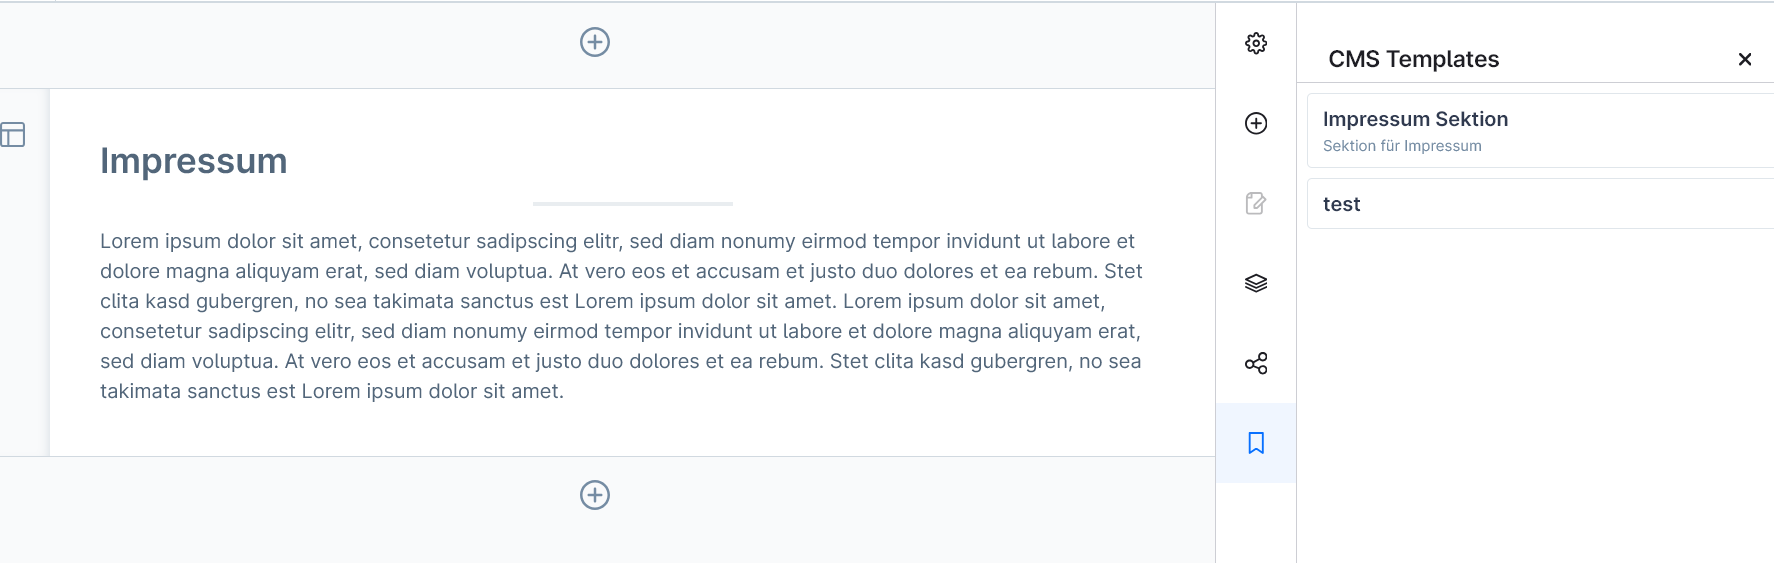
- In the right sidebar, click the bottom icon (Bookmark icon) with the title „CMS Templates“ click.
- A panel opens with all saved section templates.
- Click on the desired template entry.
The template is immediately added to the end of the world of experience. The page refreshes automatically so that the new section is immediately visible.
Manage templates
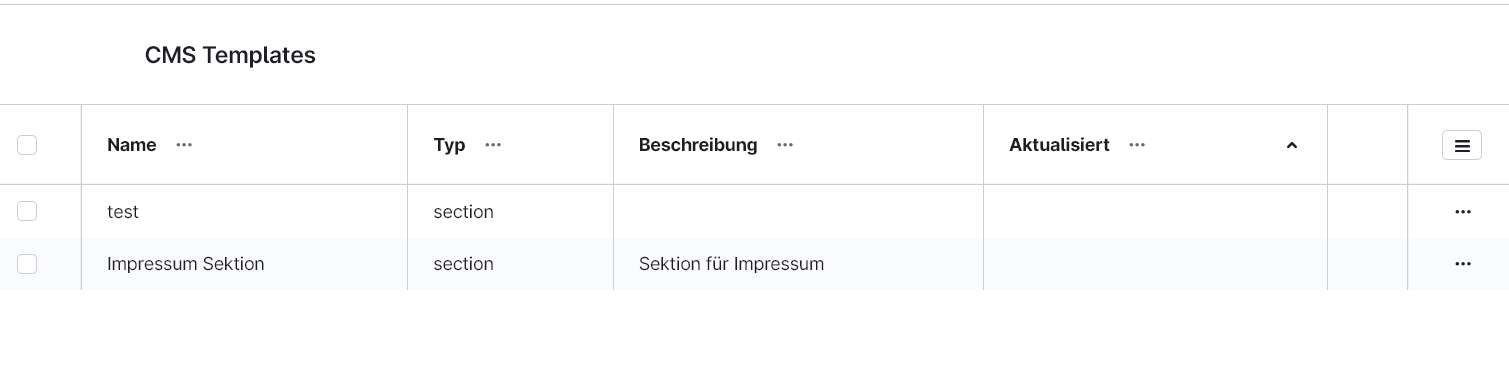
Contents → CMS Templates in the main menu of the administration opens the administration. There you can:
- Search and sort templates by name, type or update date
- Rename or describe templates
- Delete templates that are no longer required individually or via multiple selection
5 · Copy to a linked shop (cross-shop)
Sections, blocks and elements can be used not only within the same shop, but also to another Shopware shop transfer – e.g. from a staging shop to a live shop or to a mirrored language/country shop. The transfer takes place on the server side via the target shop’s Admin API. Any missing media files are automatically created in the destination shop (The folder structure is replicated, and image files are uploaded).
5.1 · Preparing the target shop (creating the integration)
In the Zielshop API access is required:
- Go to the Administration section in the Zielshop: Settings → System → Integrations.
- First, a suitable one Role create (Settings → System → Users & Permissions → Roles → „Create role“). A slim role with exactly two sections is sufficient – not „Administrator“: Worlds of Experience (View, Edit, Create) and Media (View, Edit, Create, Delete). The „Delete“ option for media is only needed so that a failed image upload can be properly rolled back.
- „Add integration“ Click, give it a name (e.g. „CMS Copy“) and assign the folder you have just created to it Role assign.
- Access Key ID and Secret Access Key make a note of it. The secret is only once displayed when creating.
5.2 · Save the connection details in the source shop
In the Source Shop (in which the plugin is installed):
- Contents → Linked shops Open it from the main menu.
- „Add connection“ click.
- Enter: Name the connection (freely selectable), Base URL of the destination shop (e.g.
https://shop.example.com) and Access Key ID and Secret Access Key from step 5.1. - Save. The secret is stored in encrypted form and is never displayed in plain text again (to change it, simply re-enter it; leave it blank to keep it unchanged).
- On „Test connection“ Click. If successful, the status will appear „OK“ including the Shopware version detected for the target shop.
5.3 · Copying content to the linked shop
- In the source shop, open the section, block or element you wish to copy, as described in sections 1–3.
- In the dialogue box at the top, the Objective by „This shop“ on „Connected Shop“ switch over.
- The Connection select → the Destination experience world Select from the linked shop.
- For blocks or elements, also the Target section or the Target block and that Target element Select (only destinations compatible with the vehicle type will be offered).
- On „Copy“ click.
After the transfer, a Results window, which summarises what has been transferred – the number of blocks or elements copied, and the number of mirrored media files. With „Done“ close.
5.4 · What to bear in mind when copying across shops
- Media: Linked images are recreated in the destination shop using the same folder structure. Any existing media files (with the same file name) are reused – Running the process again will not produce any duplicates.
- Version numbers: The source and destination shops should be running the same main version of Shopware. If there are significant differences between versions, individual element types may vary.
- Plugin-specific CMS elements: The destination shop should have the same CMS element plugins installed as the source shop (which is the case anyway for mirrored shops). If a copied section or block contains an element from a plugin that is not present in the destination shop missing, although this block is transmitted, it cannot be not rendered – it remains an invisible, non-functional placeholder. If in doubt, remove the relevant block from the destination shop afterwards or install the missing plugin there.
- Product/category links: Element configurations that refer to product or category IDs will only work in the destination shop if the same IDs exist there (typically in mirrored shops). In non-mirrored shops, such links may need to be created manually.
- Languages: The system/default language of the source shop is always converted into the default language of the target shop – regardless of which language is currently set in the admin panel. Additional translations are currently not to be carried over; other languages in the target shop remain blank and must be maintained separately there.
- Rights: If the integration’s write permissions in the target shop are insufficient, the transfer will fail with an error message – in which case, extend the integration’s role (section 5.1).
FAQs
Support
If you have any questions or problems, please do not hesitate to contact us:
- Support request: biloba-it.de/shopware-plugin-support
- e-mail: support@biloba-it.de
- Phone: +49 (0) 711 - 13633800
No solution found?
Describe your problem to us - we'll take a look at it and get back to you as soon as possible.
 German
  English