Installation instructions
Install the extension via the extension area.
OpenAI API key
- Go to https://platform.openai.com/.
- Log in.
- Create a new project.
- Go to your profile and go to the "API keys" section https://platform.openai.com/settings/organization/api-keys.
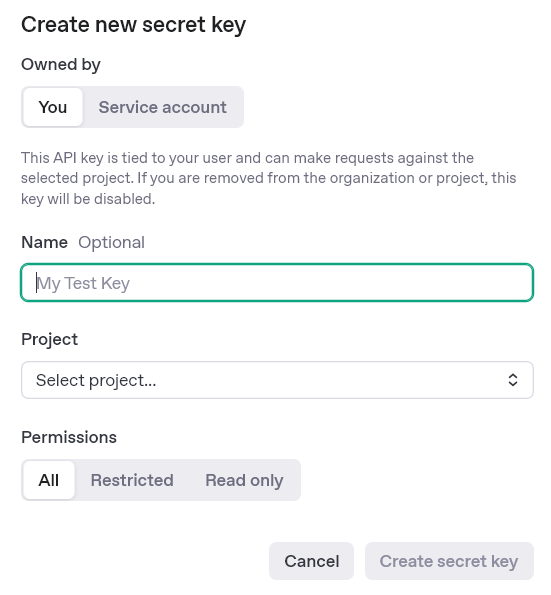
- Create a new API key via "Create new secret key".
- Top up credit so that the OpenAI API works. https://platform.openai.com/settings/organization/billing/overview
- Optional: We recommend that a usage limit is set so that no unnecessary costs are incurred in the event of an error https://platform.openai.com/settings/organization/limits
Gemini API key (Google AI Studio)
- https://aistudio.google.com/ and sign in with your Google account
- Left in the menu on Get API key click
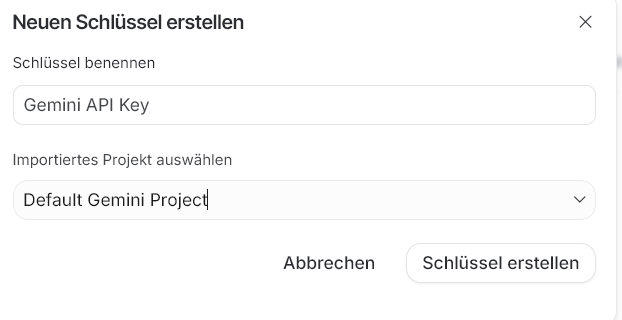
- Create API key and create a new Google Cloud project if necessary
- Copy the generated key
- Insert and save the key in the app settings in the Shopware backend
- Optional: We recommend that you set a rate limit for usage so that no unnecessary costs are incurred in the event of an error https://aistudio.google.com/rate-limit
Claude API key (Anthropic Console)
- https://console.anthropic.com/ call up and log in / register
- Left in the menu on API Keys click
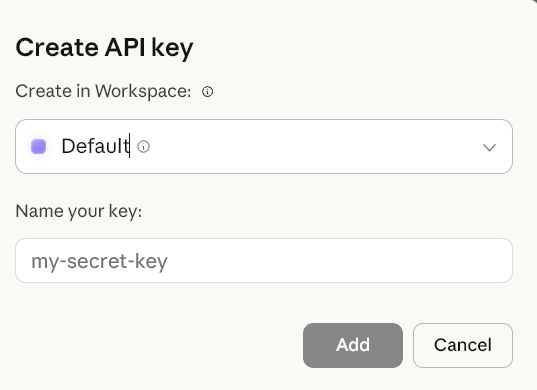
- Create Key select, assign a name (e.g. „Shopware - “) and confirm
- Copy the displayed key immediately (it is only displayed once)
- Insert and save the key in the app settings in the Shopware backend
- Optional: We recommend that a usage limit is set so that no unnecessary costs are incurred in the event of an error https://platform.claude.com/settings/limits
Mistral API key
Go to https://console.mistral.ai/
Create an account or log in
Create API key and enter in Shopware extension
Top up credit
Note: European provider (GDPR-compliant)
Setting up the extension in Shopware
API credentials
- Enter the API key, which should start with „sk-proj“ for OpenAI.
- Select your desired AI model.
OpenAI Frontend Assistant
A selection is only available if a front-end wizard has been created.
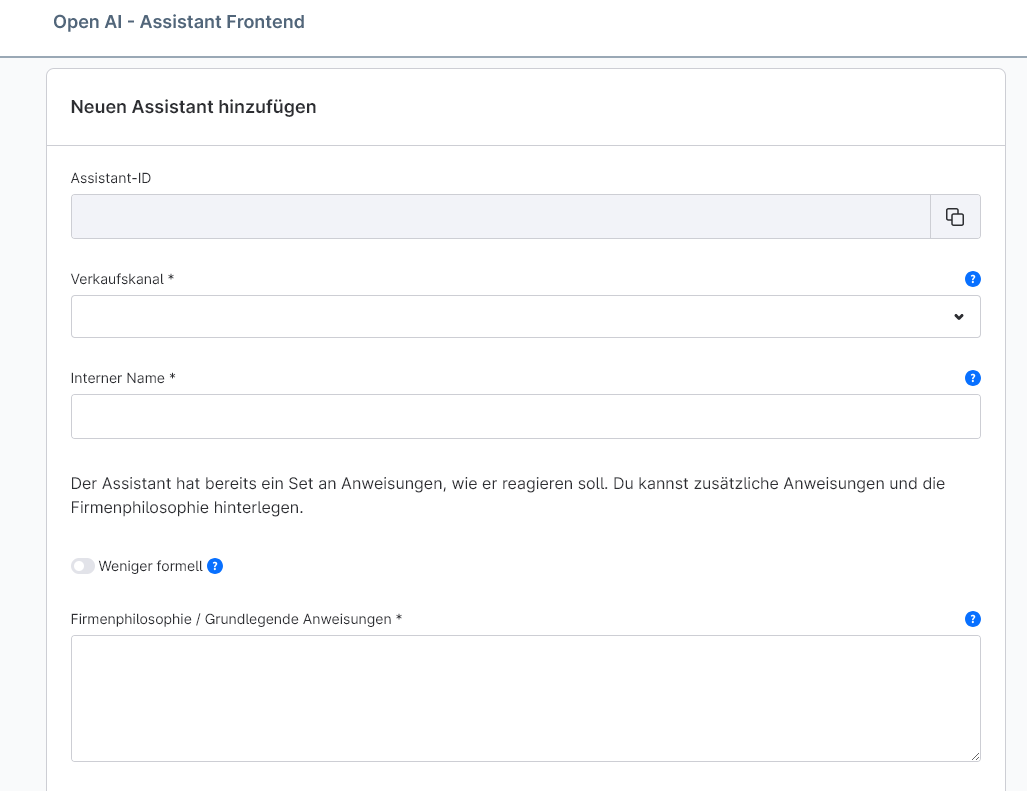
- To create a frontend assistant, go to Catalogues -> OpenAI Assistant Frontend.
- Select "Add new assistant".
- The Assistant ID is created automatically.
- Select your desired sales channel.
- Name your assistant so that it is easily recognisable.
- Choose whether you want a formal or less formal tone.
- Store additional information for the assistant, such as separate instructions or an FAQ.
- Select the AI model here.
- The temperature indicates how random the AI's answers are. Further information here: https://platform.openai.com/docs/api-reference/assistants/modifyAssistant
- Top P is an alternative sampling method similar to temperature. Further information here: https://platform.openai.com/docs/api-reference/assistants/modifyAssistant#assistants-modifyassistant-top_p
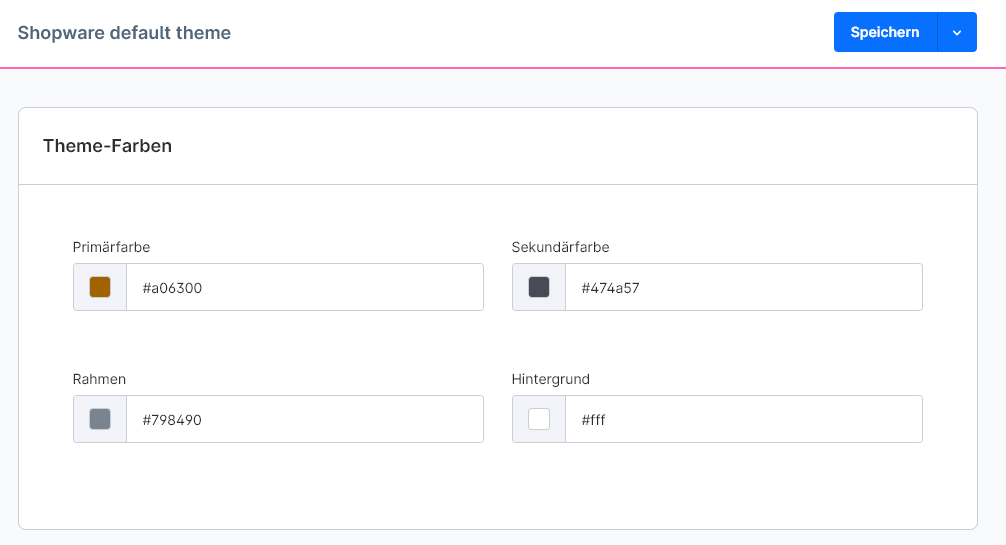
- The design colour of the frontend assistant is based on the "primary colour" in the theme.
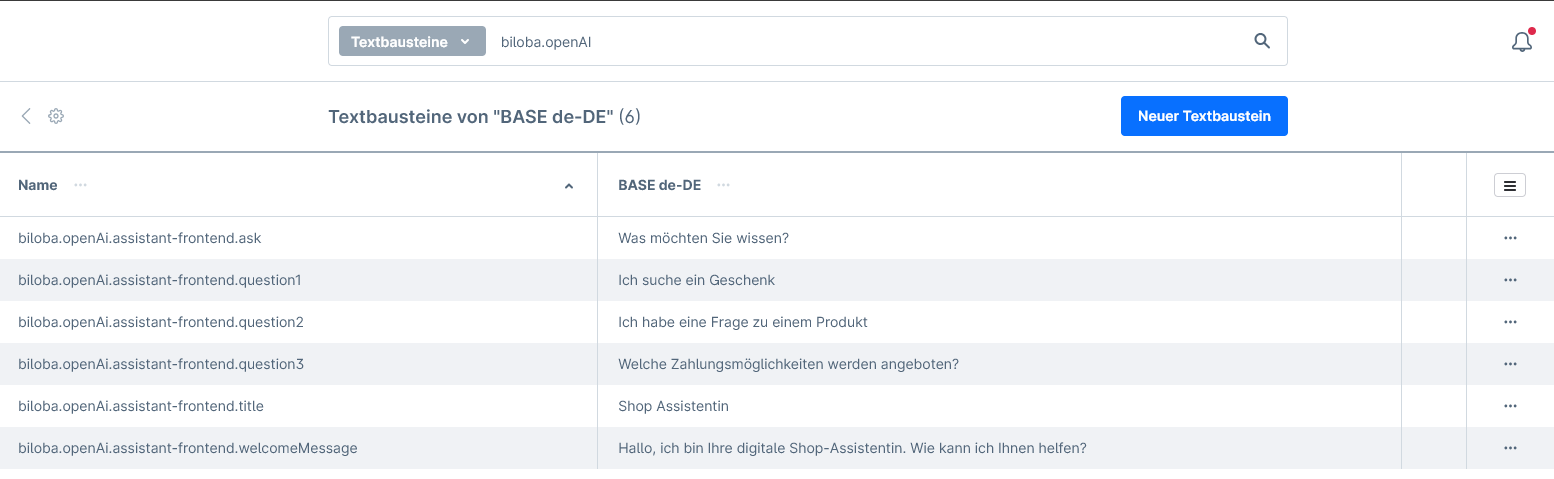
- The frontend wizard texts can be customised using the text modules:
- The text modules can be found under Settings, in Shopware 6.6 Settings->Shop.
- The search window in the text module set can be used to search for "biloba.openAI".
- The following values can then be adjusted here:
Configurable questions in the front-end wizard
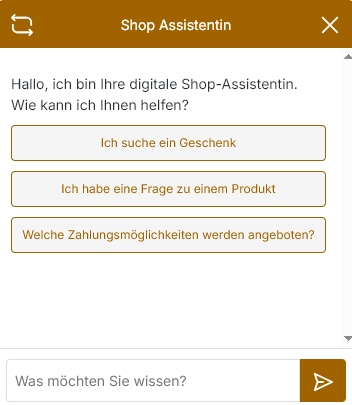
In the assistant form, up to 6 predefined quick questions can be configured; these are displayed to the customer in the chat window as clickable suggestions.
View question
Fill in the relevant text block question1 up to question6 — a question is displayed as soon as the text block contains a value.
Hide question
Toggle the switch „Hide question N in the front end“ in the wizard configuration (assistantFrontendHideQuestion1 up to assistantFrontendHideQuestion6). The question will then no longer be displayed, even if the text block has been filled in.
Important (Shopware 6.6 compatibility): The text block to hide do not empty — In Shopware 6.6, the value automatically reverts to the default file setting when you save, and the prompt reappears. Always use the toggle to hide it; it works reliably in all supported Shopware versions.
Chat retention (GDPR)
In the assistant configuration, the field „Chat retention in days“ determines how long front-end assistant chats are saved:
- Empty / not set → Unlimited storage
- 0 → Unlimited storage
- N > 0 → Chats that are older than N days are deleted daily at 01:30 automatically deleted (Cron
chat:retention:clean).
DSGVO-Default: For newly created assistants and existing assistants without a set value, a retention period of 7 days, as soon as the plugin has been updated.
Auto-categorisation of chats (Frontend Assistant Plus)
Premium function: This function requires the in-app purchase „Frontend Assistant Plus“. Without an active IAP, the toggle, filter and column are hidden.
Frontend assistant chats are automatically categorised into one of 7 categories:
- Shipping
- Returns
- Product
- Price
- Availability
- Technical
- Other
Categorisation runs in the hourly background job chat:analyse and picks up threads that have been inactive for at least 30 minutes. If confidence scoring is also activated (see next section), the job does both in one AI call per chat.
In the admin backend of the plugin:
- In the assistant edit form: new toggle „Auto-categorisation of chats“
- In the „Assistant Frontend Log“ tab: new „Category“ filter and new „Category“ column in the chat list
- The category is also written to the CSV export
Confidence scoring & content gap analysis (Frontend Assistant Plus)
Premium function: This function requires the in-app purchase „Frontend Assistant Plus“. Without an active IAP, the toggle, filter, button and the associated tab are hidden.
After a completed chat (at least 30 minutes of inactivity), the AI rates on a scale of 0 to 10, how well the bot responded - 10 = hit the mark perfectly, 0 = completely missed the point. The evaluation runs in the same hourly cron chat:analyse such as auto-categorisation (a joint AI call when both toggles are active).
Configuration per wizard:
- Toggle „Activate confidence scoring“
- Threshold value „Low Confidence ab“ (Default: 5) - Chats with a rating ≤ threshold are considered weak.
In the „Assistant Frontend Log“ tab:
- New column „Confidence“ shows the score per chat.
- Filter „Only low confidence“ only shows chats below the threshold value.
- Multiple selection of rows via checkboxes.
- Button „Evaluate content gaps“ starts a job that collects the marked low-rated chats, analyses them together and creates a report on missing content, FAQs and help pages in the shop.
Where can I find the reports? In the new tab „Content Gap Reports“ (see section „OpenAI - Logs & Data“).
Checking the shop data with the OpenAI Assistant
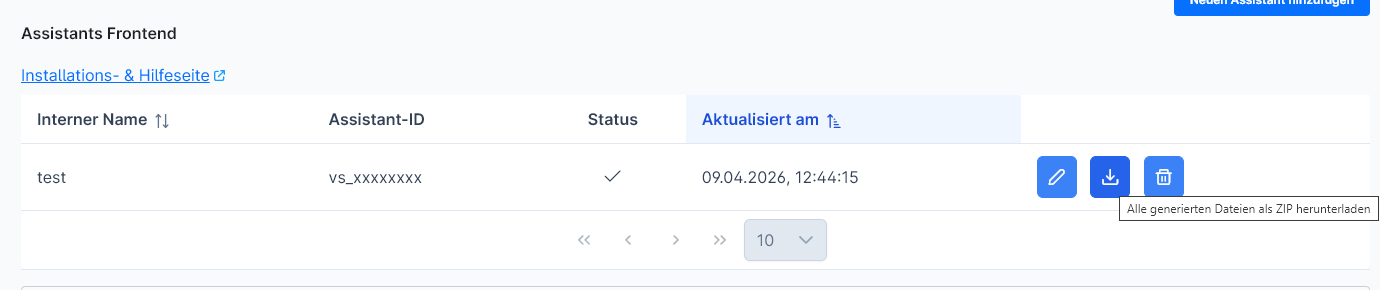
The assistant records the shop data every 24 hours and saves it as files, which are loaded into the vector database at OpenAI. The files can be downloaded and checked at any time.
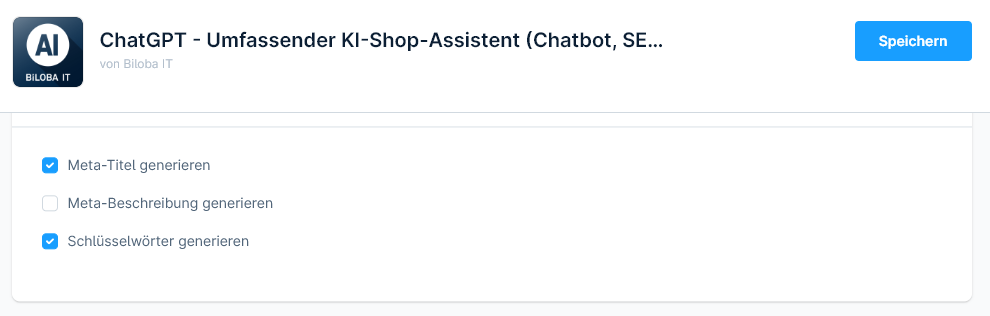
Settings "All META tags product / category (configured)"
Settings for the creation of SEO data in mass processing. These settings are only for mass processing or for the "All META tags (configured)" button in single mode.
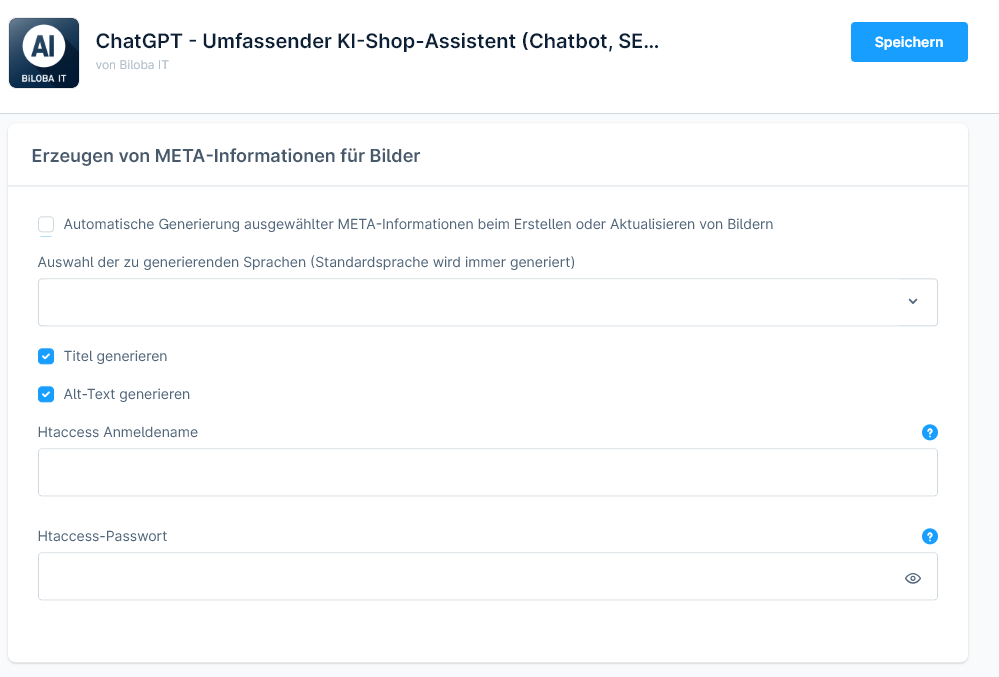
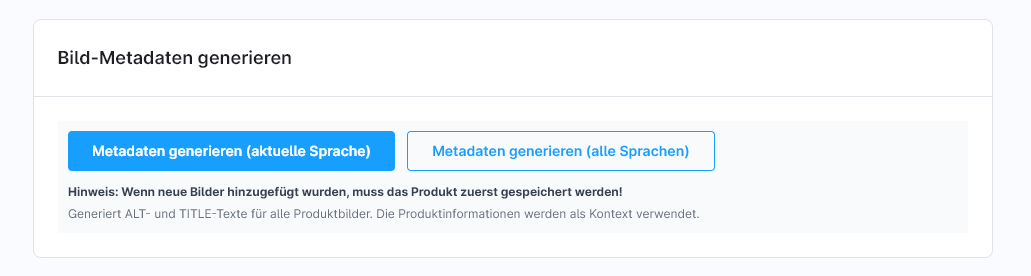
Creating META information for images
- Automatic generation of selected META information when creating or updating images: this setting allows the META information for images to be inserted directly when uploading or updating. This works automatically, please check your OpenAI limits.
- This option works NOT with the product context. In order for meta data to be generated with the product context, the article must first be saved with the desired image. This is necessary for the assignment.
- Selection of languages to be generated (default language is always generated): a list of the languages in which the META information is generated.
- Checkboxes which information is processed in mass processing and automated creation.
- If you have an active Htaccess for your shop, you must enter these login details here so that the image META information can be created. This is necessary because the images are analysed by OpenAI and access is required.
General settings
- Keywords: Global keywords that are to be taken into account by the AI during META generation.
- Polite form: Which form is used when creating texts.
- The temperature indicates how random the AI's answers are. Further information here: https://platform.openai.com/docs/api-reference/assistants/modifyAssistant#assistants-modifyassistant-temperature
- Top P is an alternative sampling method similar to temperature. Further information here: https://platform.openai.com/docs/api-reference/assistants/modifyAssistant#assistants-modifyassistant-top_p
AI processing single entity
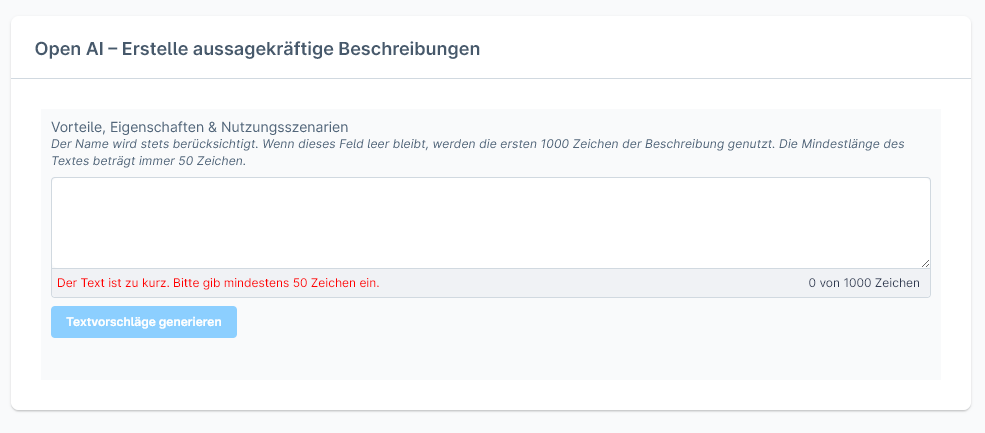
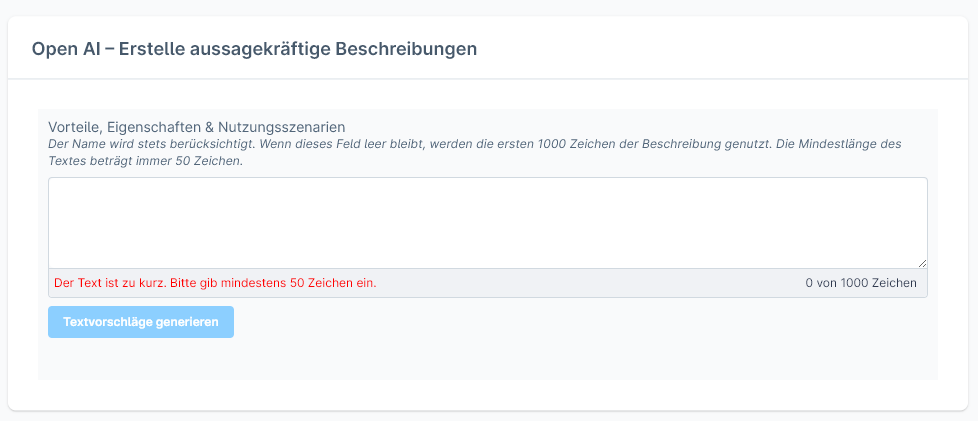
Product description
- Go to Catalogues -> Products and select your desired product.
- If there is a product description, this and the product title are used.
- If no description is available, please enter a text of 50-1000 characters. This will be used to create the description.
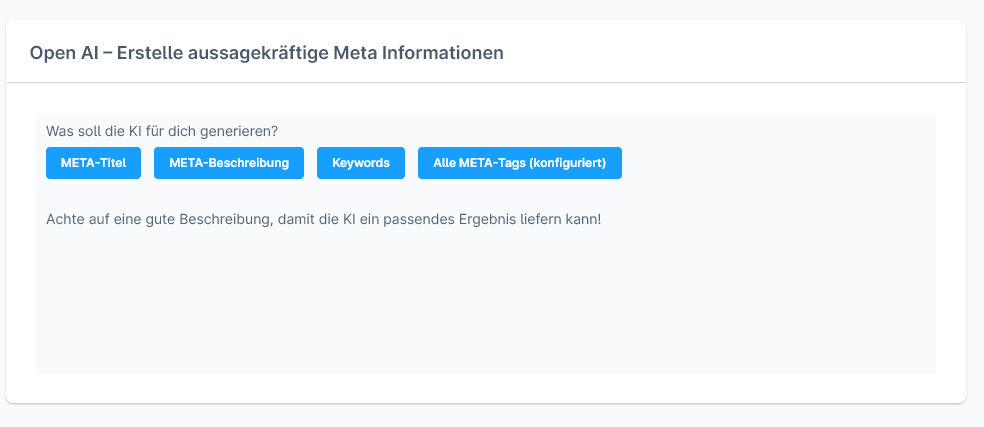
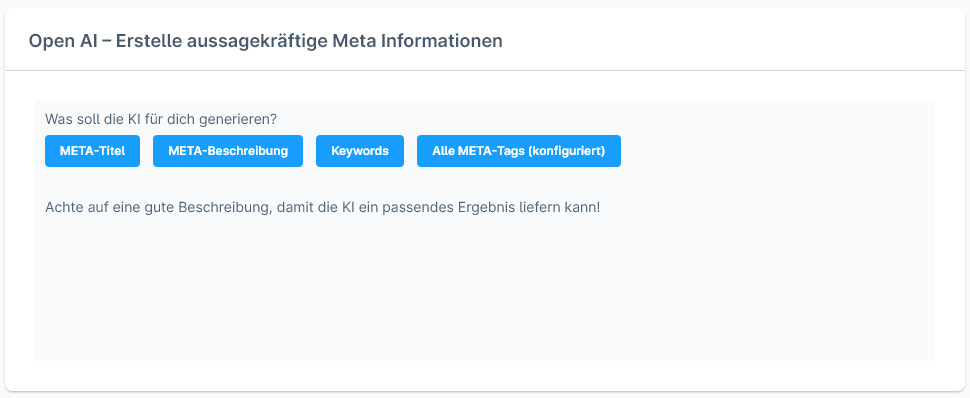
Products SEO data
- Go to Catalogues -> Products and select your desired product.
- Meta title, meta description and keywords can be created in the SEO area.
- Use the corresponding button to create your desired SEO data or all three.
Products Images Meta Data
- Go to Catalogues->Products and select your desired product.
- Go to the pictures section.
- Meta data can be generated here for images that have already been saved.
- Please note that meta data is only generated if the article has been saved with the desired images.
AI-generated text in free-text fields (Custom Fields) – Product and category pages (Prompts Plus)
Premium function: This function requires the in-app purchase „Prompts Plus“. Without an active IAP, the box is hidden.
On the product and category pages, the „Free-text fields“ tab features a box that allows AI-generated text to be entered directly into text-enabled custom fields. Using bulk editing, custom fields can also be populated for several products or categories at the same time (select „Product Additional Field“ or „Category Additional Field“ in the bulk update, Prompts Plus IAP):
- Dropdown with all text-enabled custom fields of the product
- „Generate“ button to trigger AI text creation
- Status display during generation
Ideal for structured additional information such as care instructions, technical specifications or USPs, which are maintained in separate custom fields on the product or category page.
Category Description
- Go to Catalogues -> Categories and select your desired category.
- If there is a product description, this and the product title are used.
- If no description is available, please enter a text of 50-1000 characters. This will be used to create the description.
Category SEO data
- Go to Catalogues -> Categories and select your desired category.
- Meta title, meta description and keywords can be created in the SEO area.
- Use the corresponding button to create your desired SEO data or all three.
Bulk text editing
- Go to Catalogues -> Open AI - Mass update.
- The desired area to be edited can be selected in "Area".
- Product description
- Product META information
- Image alt and title text
- Additional product field (Prompts Plus IAP)
- Additional category field (Prompts Plus IAP)
- Individual settings are available for the various areas
- Filter specifies whether something should be taken into account when selecting the areas to be processed, such as only processing entities that have not yet been processed by the AI
- Languages specifies which language is to be edited.
- Categories offers a category selection. This is used to narrow down the entities to be edited. Select all categories with Shift+click to edit all entities.
- The entities found, which are processed, are listed below.
- In the "Currently running bulk jobs" area, it is displayed whether a job is currently running

Prompting
Overview
The Prompting module allows you to customise and modify AI text generation. It is possible to extend or replace the default prompts. A basic understanding of prompting is required, so this module is only recommended for „experts“.
Access to the prompting module
The prompting module can be accessed in two ways:
- About the settings: Navigate to Settings → Plugins → Open AI Prompts.
- About the mass update: In the mass update module, you will find a „Configure prompts“ link directly in the configuration view.
Available areas
The following areas are available to you in this app:
- Product description: Generation of product texts
- Product meta title: SEO-optimised product titles
- Product meta description: SEO descriptions for products
- Product meta keywords: Relevant keywords for products
- Category description: Category texts
- Category metadata: SEO data for categories
- Media metadata: Alt texts and titles for images, product context can be set here. Please note.
Configuration options per area
1. Additional prompt (optional)
- Special instructions can be added here, which are sent to the AI in addition to the standard system prompt.
2. Available variables
- The available variables are displayed for each area.
- Variables can be clicked directly to insert them into the additional prompt.
- The variables are automatically inserted at the cursor position in the text.
- Available variables depending on the area:
##targetLanguage##– Target language##productName##– Product name##productText##– Product description##productNumber##– Item number/MPN##productManufacturerName##– Manufacturer name##productManufacturerDescription##– Manufacturer's description##categoryName##– Category name##categoryText##– Category description##lengthFrom##/##lengthTo##– Text length specifications##keywords_amount##– Number of keywords##productProperties##- Technical product properties from Shopware (e.g. „Colour: Black, Material: Metal, Size: XL“). Only available if the „Include product properties“ toggle is active.##productCategories##- Product categories from Shopware (e.g. „Lighting, ceiling lights, LED“). Only available if the „Include product categories“ toggle is active. Helps the AI model to understand the product type and avoids hallucinations with unclear product names.##productImageMeta##- Title and alt texts of the product images (e.g. „Black ceiling light front view (alt: modern LED ceiling light)“). Only available if the „Include product image information“ toggle is active.
3. AI model selection
- The OpenAI model can be selected for text generation.
- Different models have different strengths and costs:
- GPT-5.5: Latest top model, best quality for complex tasks
- GPT-5 Mini: Fast and cost-effective, ideal for large volumes
- GPT-5: Balanced performance and quality
- GPT-5 Nano: Compact model for simple tasks
- GPT-4.1 series: Older models, still available
4. System prompt settings
- The standard system prompt contains the basic instructions for the AI.
- Option „Disable default system prompt“: can be used if you want to take complete control. Please only activate if you are familiar with prompting.
- The current system prompt is displayed for transparency.
5. toggle settings
- In the prompt settings (Settings → Extensions → Open AI Prompts), there are three toggles per prompt type to control the context:
- Include product features - controls whether
##productProperties##is filled with data. - Include product categories - controls whether
##productCategories##is filled with data. - Include product image information - controls whether
##productImageMeta##is filled with data. - All toggles are activated by default. Deactivating them saves token costs, but reduces the context for the AI.
Important note: The variables are automatically hidden if the respective product has no suitable data (e.g. no category assigned). The ##IF_variableName##...##ENDIF_variableName##-blocks in the system prompt are then removed.
Important information for prompting
Caution when adjusting prompts:
- Prompts should only be adapted if you are familiar with prompting.
- All adjustments are made at your own risk.
- Test changes first in single mode or in mass editing with a few elements.
- The prompt that was actually sent can be checked in the logging module in the detailed view.
Best practices for your own prompts
- Be specific: The more precise your instructions, the better the result.
- Use variables: Use the available variables for dynamic content.
- Test step by step: Start with small changes and test the results.
- Examples are helpful: Give the AI examples of the desired style.
- Note the length specifications: Use the length variables for precise text lengths.
Examples of additional prompts
For product descriptions:
Write in an enthusiastic tone and use bullet points for the most important features. Start with a compelling introductory sentence that addresses the main problem that ##productName## solves.For meta titles:
Always include the manufacturer name ##productManufacturerName## at the beginning of the title. Use action-oriented words such as "Buy", "Order" or "Discover".For category descriptions:
Structure the description in 3 paragraphs: 1. Introduction to the category 2. Main advantages of the products in this category 3. Call to action to browseLogging and control
After the text has been generated, it can be checked in the logging module:
- Which prompt was actually sent to the AI.
- How the variables were replaced.
- What result was generated.
This helps you to continuously optimise your prompts.
Tips for troubleshooting
- Texts that are too short/long: Adjust the length specifications in the plugin configuration.
- Wrong tone: Add specific sound instructions in the additional prompt.
- Missing information: Ensure that all required product data is maintained.
- Inconsistent results: Use more specific instructions or change the model.
Custom fields as prompt variables (Prompts Plus)
Premium function: Variables are only replaced by the corresponding custom field values if the „Prompts Plus“ in-app purchase is active.
Within prompts, your own custom fields from products, categories and properties can be used as variables. When generating, the AI automatically replaces these placeholders with the corresponding values:
##productCustomField_##- Value of a product custom field (<name>= technical name of the custom field)##categoryCustomField_##- Value of a category custom field##propertyCustomField_##- Value of a property custom field
Example:
„Write a product description focussing on ##productCustomField_care instructions## and ##productCustomField_materials##.“
Without active Prompts Plus IAP, the placeholders remain unchanged in the generated text and are not replaced.
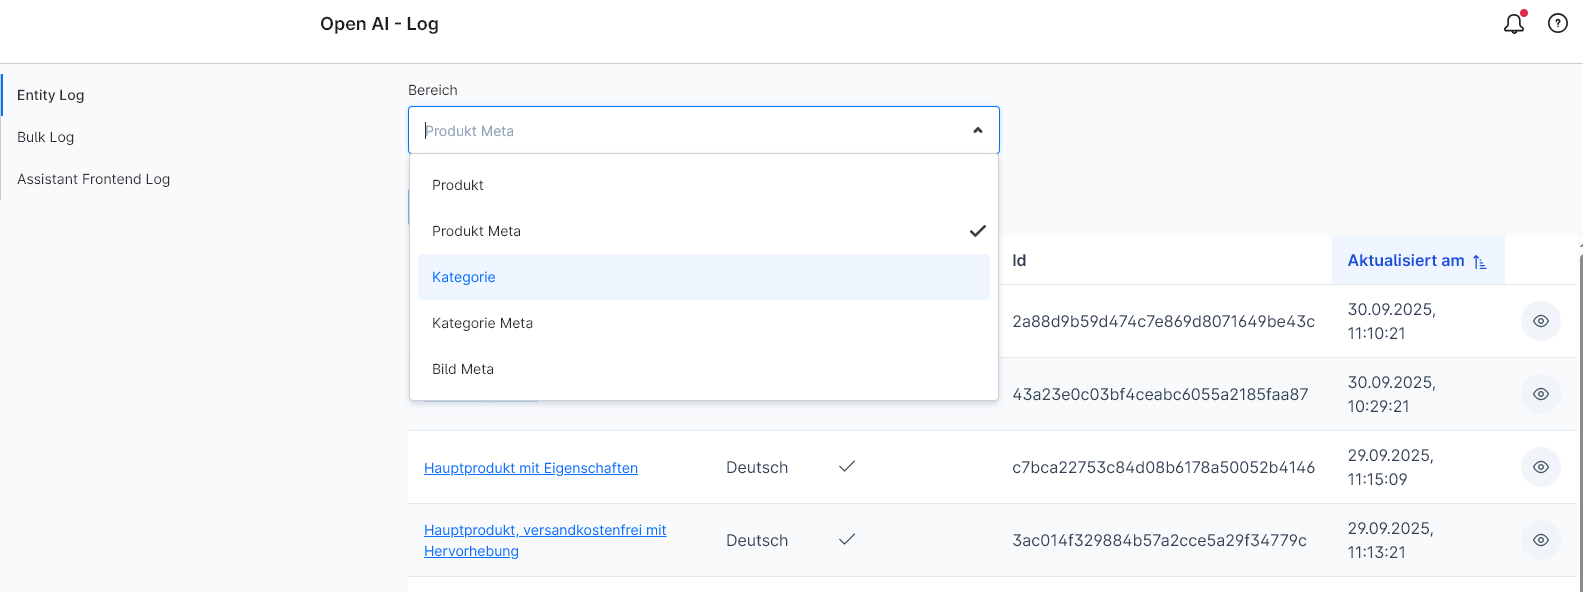
OpenAI - Logs & Data
The „OpenAI - Logs & Data“ module (formerly „OpenAI - Log“) records every job that has run for the corresponding areas. If a job does not run, the log is the first point of contact. The module also bundles the tabs FAQ and Content gap reports.
Go to Catalogues -> OpenAI - Logs & Data
Entity Log
The individual entities that are processed by the AI are entered here and sorted by area.
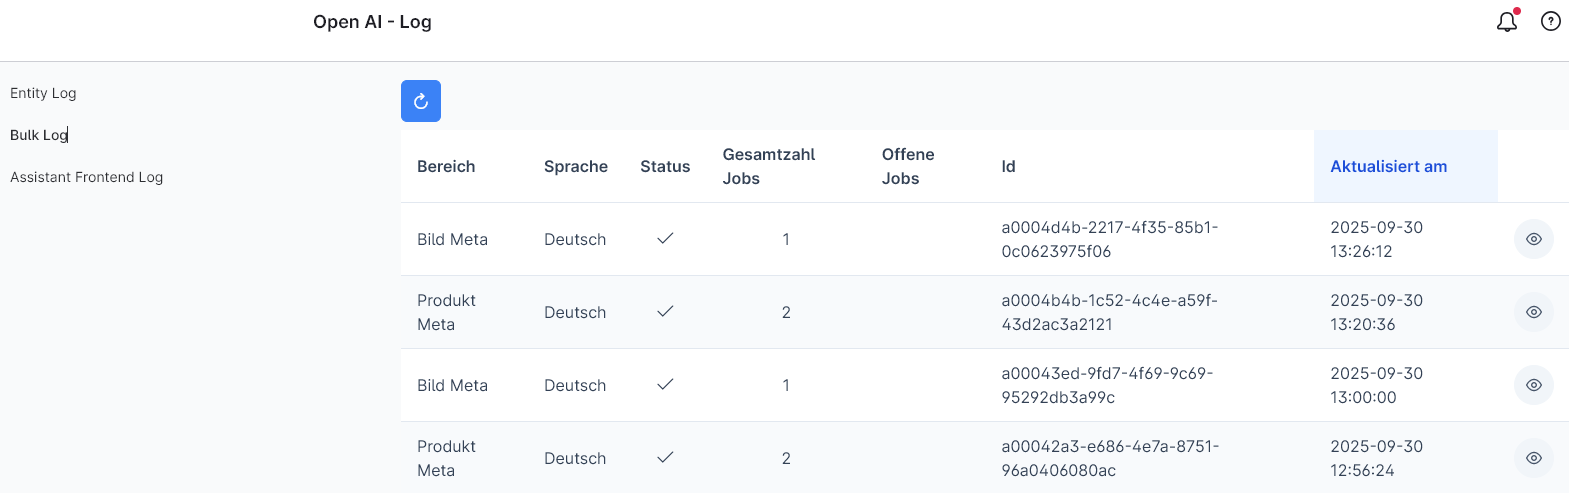
Bulk Log
The bulk log jobs are entered here.
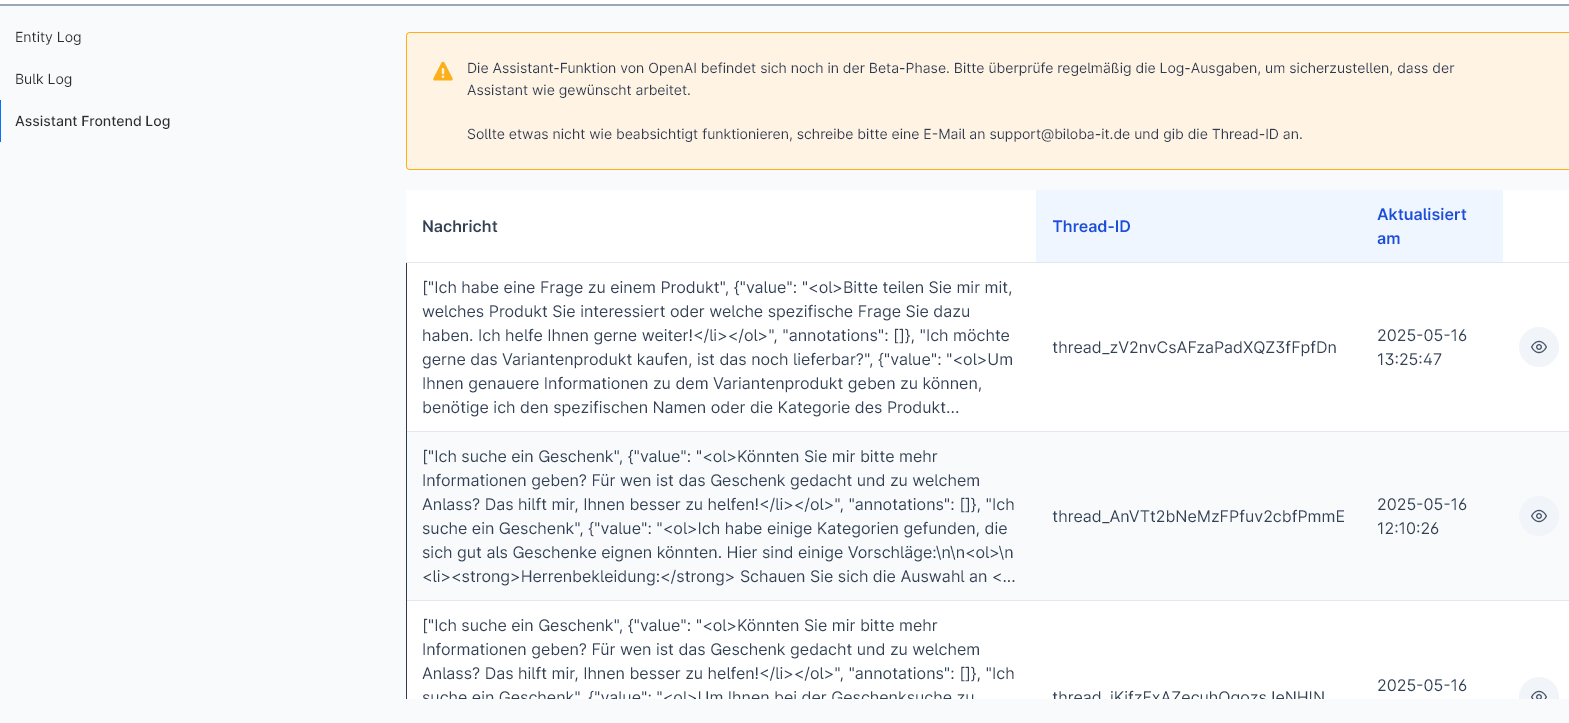
Assistant Frontend Log
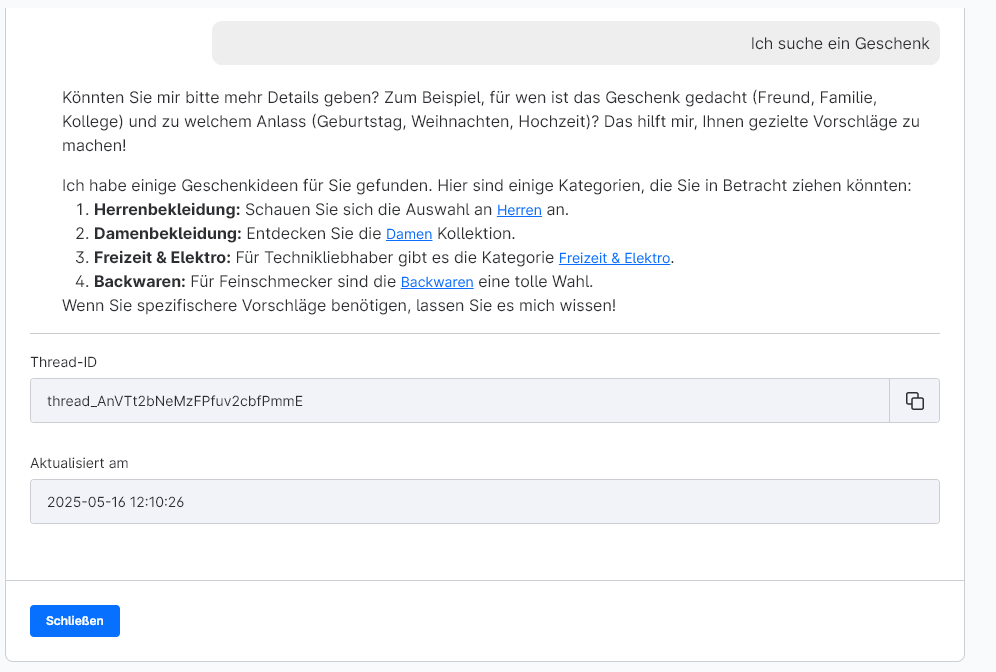
The customer messages are entered here with the front-end assistant and you can see how the assistant reacts to them in the detailed view.
Common errors - entries in the log:
- error_no_credits: indicates that no credit is stored in the OpenAI account.
Export chat questions (CSV)
Via the button „Export chat questions“ In the „Assistant Frontend Log“ tab, all chat histories can be downloaded as a CSV. A separate column is created for each thread, which contains the question-answer pairs - separated by ---.
Before exporting, the result can be filtered by:
- date (period)
- Sales channel
- Category (only with active auto-categorisation)
Create FAQ from chat
In the detailed view of a chat (click on an entry in the „Assistant Frontend Log“), the button „Create FAQ from chat“ available. The AI suggests a question and a suitable answer based on the chat history. You can edit both texts before saving them.
All FAQs created in this way are displayed in the new tab „FAQ“ (see below) and are then available to the front-end wizard as a source of knowledge.
FAQ
In the „FAQ“ tab, you can manage all FAQ entries created manually or via „Create FAQ from chat“. You can see the question, answer, assigned sales channel and creation/modification date for each entry. Entries can be edited, deactivated and deleted.
Content gap reports (Frontend Assistant Plus)
Premium function: Requires the in-app purchase „Frontend Assistant Plus“.
In the „Content gap reports“ tab, you will find all analyses that you have initiated via the „Evaluate content gaps“ button in the Assistant Frontend Log. Each report shows which topics, FAQs or help pages in the shop are missing or should be added - derived from the weakly rated chats of the respective selection.
MCP server administration
What are MCP servers?
MCP servers (Model Context Protocol) are external services that give the AI additional capabilities. During text generation, the AI can contact these servers to retrieve real-time data - for example, current SEO keywords, search volumes or competition analyses.
Add server
To add a new MCP server:
- Click on „Add server“
- Enter a name for the server (e.g. „SEO Keywords“)
- Select the server type from the list
- Enter the required access data (API key, URL, etc.)
- Save the configuration
Test server
After saving, you can test the connection:
- Click on the test icon next to the server
- The server is contacted and the available tools are retrieved
- If the connection is successful, you will see a confirmation
Link server with prompts
So that an MCP server is used for text generation:
- Go to the prompt settings
- Select the desired prompt type (e.g. „Product description“)
- In the „MCP server“ section, select the servers to be used
- Save the settings
The AI then automatically uses the linked servers during generation.
Troubleshooting
Server connection failed:
- Check the access data (API key, URL)
- Ensure that the server is accessible
- Check whether your API quota has not yet been exhausted
No tools available:
- The MCP server may not respond correctly
- Contact the provider of the MCP server
Generation takes longer:
- MCP server requests can extend the generation time
- This is normal as additional data is retrieved
In-app purchases
What is Prompts Plus?
Prompts Plus is an optional upgrade that unlocks advanced features for your AI text generation. The most important feature is the MCP server integration, which allows you to integrate external data sources.
Included functions
- MCP server integrationConnect external tools and data sources
- Advanced prompt optionsLink server with specific prompts
- Real-time data queriesAI accesses current data during generation
Purchase and activation
- The purchase is made directly via the Shopware Store
- The feature is activated automatically after purchase
- You can see the status in the „In-App Purchases“ overview in the log area
Subscription information
- Prompts Plus is a monthly subscription
- You can see the remaining runtime in the „In-App Purchases“ overview
- The subscription is automatically renewed via the Shopware Store
System requirements
- Shopware version 6.6.9.0 or higher
- Active Internet connection for MCP server communication
Logging GDPR consents
Overview
The AI shop assistant (front-end chatbot) can, if desired, log on the server side when a storefront user has consented to the use of the chatbot. This function serves the obligation to provide evidence in accordance with Art. 6 para. 1 lit. a GDPR and is only required if your data protection officer requires documented consent.
All data is stored pseudonymised - no real names, e-mail addresses or IP addresses are recorded in plain text.
Prerequisite: „Frontend Assistant Plus“ in-app purchase“
Consent logging is a premium function and requires the in-app purchase „Frontend Assistant Plus“.
How to purchase the in-app purchase
- Open the AI shop assistant in the Shopware admin
- Navigate to the „Logging“ tab“
- There you will see a banner: „Premium function: Frontend Assistant Plus“
- Click on „Activate now“ - the Shopware in-app purchase dialogue opens
- The function is activated immediately after completion of the purchase
Alternatively, you can also trigger the purchase directly in the wizard settings (tab „Frontend wizard“) via the activation banner displayed there.
HintThe in-app purchase requires at least Shopware 6.6.9.0.
Activate consent logging
After purchasing the in-app purchase, you must activate logging individually for each assistant:
- Open the AI shop assistant in the Shopware admin
- Navigate to the „Frontend Assistant“ tab“
- Edit the desired assistant
- Activate the „Log GDPR consents“ switch“
- Save the changes
Both conditions must be met for consent to actually be recorded:
- The in-app purchase „Frontend Assistant Plus“ must be active
- The „Log GDPR consents“ switch must be switched on for the respective assistant
What is logged?
If a storefront visitor accepts the chatbot's consent dialogue, the following data is collected:
- Timestamp: Date and time of consent
- Thread ID: Identifier of the chat conversation (is subsequently assigned as soon as the first message is sent)
- Consent text version: SHA-256 hash of the consent text - this makes it possible to trace which exact wording was accepted
- IP hash: Pseudonymised hash of the IP address (the real IP is not saved)
- User Agent: Browser identification of the user
Pseudonymisation
The IP address is hashed with a server-side key (SHA-256) before it is saved. The original IP address cannot be reconstructed from the hash. No personal data such as name, e-mail or customer number is recorded.
Consent text versioning
The complete consent text is archived once on the server. For each consent, the hash is used to check which version of the text the user has accepted. This means that even in the event of subsequent changes to the text, it can be seamlessly verified which wording was agreed to.
View consent logs
You can view the logged consents in the Shopware admin:
- Open the AI Shop Assistant
- Navigate to the „Logging“ tab“
- Select the „GDPR consents“ sub-tab
Table view
The log overview shows you the following columns:
- Timestamp: Date and time of consent
- Thread ID: Clickable - opens a detail window with the complete chat history
- Version (hash): Clickable - shows the full consent text
- IP hash: Pseudonymised IP hash
- User agent: Browser identifier
Filter options
- Date filter: Limit the time period via From/To
- Page size: Choose between 10, 20, 25 (standard), 50 or 100 entries per page
Detailed views
Version detail (click on hash):
- Complete consent text that has been agreed to
- Time stamp of the consent
- Complete SHA-256 hash (copyable)
- Complete IP hash (can be copied)
- Complete user agent (can be copied)
Thread detail (click on thread ID):
- Complete chat history of the conversation
- Thread ID (can be copied)
- Last update date
- Note if the thread has already been deleted
CSV export
You can export the consent logs as a CSV file:
- Click on the export button in the „GDPR consents“ tab
- A CSV file is downloaded (consent_logs_YYYY-MM-DD_HHmmss.csv)
The CSV file contains: consented_at, thread_id, consent_text_version, ip_hash, user_agent (semicolon-separated, UTF-8 with BOM for Excel compatibility).
The CSV export is only available if the in-app purchase „Frontend Assistant Plus“ is active.
Data deletion
If your shop is removed from the system (e.g. when the app is uninstalled), all associated consent logs are automatically deleted. No data remains in the system.
Summary of the procedure
- Storefront visitor opens the chatbot
- Consent dialogue is displayed
- Visitor clicks „Accept“
- Consent is logged pseudonymised on the server (only if IAP is active AND logging is switched on)
- Visitor starts chat → Thread ID is subsequently assigned to the log entry
- You can view and filter the logs in the admin and export them as a CSV
FAQs
AI Shop Assistant: General questions
Open AI: General questions
The OpenAI account can be accessed via this link: https://platform.openai.com/ .
Here you will find the management of the credit, limitation and the API keys, which are necessary for the extension!
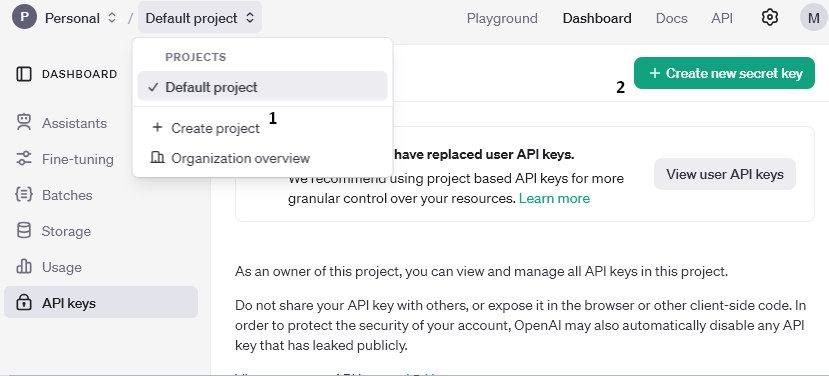
- A new project must be created first.
- A new API key can be created here and assigned to a project.
This key can be entered in the configuration of the extension.
Credits are required for the OpenAI API to function properly. As with other services, this is a "prepaid" method. You top up the credits and these are automatically "spent" as soon as the extension is used and a request is sent.
To top up credits with OpenAI, a payment method must be set up via your own profile.
The payment methods can be found under: Organisation -> Billing. A new payment method can be added here via "add payment details". If this is done, credits will also be topped up.
Credits are billed in dollars. OpenAI uses "tokens" - one token corresponds to approx. 4 characters.
Overview table from OpenAI https://openai.com/api/pricing/:

If, for example, only a certain budget of credits per month is available or for protection, limits can be set.
Monthly limits can be set via the profile: Organisation -> Limits, as well as an e-mail notification as soon as a certain amount is reached.
OpenAI provides usage in different "tiers". Initially, every user is in the "Free" tier, which severely restricts the use of the AI models to a few requests per minute. As soon as $5 has been paid for, these restrictions are greatly reduced and the extension can be used more efficiently.
Further information on the limitations can be obtained directly from OpenAI: https://platform.openai.com/docs/guides/rate-limits/usage-tiers?context=tier-free
Which current "tier" has been reached can be seen in the account here: https://platform.openai.com/settings/organization/limits
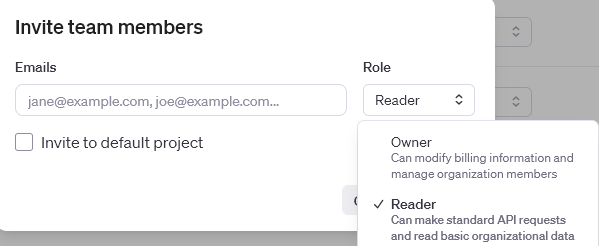
If there is interest in having someone else check settings and limits, members can be invited to join the organisation.
You can find the area here: https://platform.openai.com/settings/organization/members
A new person can be added here via "invite". There are two role options to choose from, here you can specify whether the new member can only view certain data or whether they can contribute to the organisation. As the first option is quite limited and certain tasks cannot be assigned, it is advisable to assign the "Owner" option.
For technical reasons, the extension only works on the domain for which it was purchased.
Staging and test environments are not supported.
We recommend that you always use the latest model.
For cost reasons, the predecessor model can also be used.
What is reasoning?
Reasoning is a function that instructs the AI model to go through a „thought process“ to avoid hallucinations and increase comprehensibility before giving an answer.
Reasoning from the ChatGPT5.1 model:
Since the ChatGPT5.1 model, OpenAI has offered reasoning that has significantly improved response times and the quality of responses.
No, the plugin works completely without Prompts Plus. The MCP server integration is an optional upgrade for advanced use cases.
The plugin supports all MCP servers that comply with the Model Context Protocol standard. Common examples are SEO tools, keyword research services and analysis platforms.
Generation may take a little longer as additional data is retrieved from external servers. The improved text quality due to the real-time data usually compensates for this.
Yes, relevant information (e.g. product name, keywords) is sent to the configured MCP servers for the query. Make sure you only use trustworthy servers.
Note: Biloba IT accepts no responsibility for data transmitted to external servers.
Yes, you can integrate any MCP-compatible server. Simply enter the corresponding access data in the server administration.
Text generation also works without an MCP server. If a server is not available, the text is generated without the additional data.
Support
If you have any questions or problems, please do not hesitate to contact us:
- Support request: biloba-it.de/shopware-plugin-support
- e-mail: support@biloba-it.de
- Phone: +49 (0) 711 - 13633800
No solution found?
Describe your problem to us - we'll take a look at it and get back to you as soon as possible.